Introduction to the Fixalert Admin Panel Manual:
Welcome to the Fixalert Admin Panel Manual! This guide is designed to help you navigate and fully utilize the powerful features of our admin panel. Each section of the manual is accompanied by instructional videos and detailed descriptions, making it easy for you to understand and implement the various functions offered.
In this manual, you’ll find comprehensive information on key features such as:
- Company and User Management – Learn how to create, manage, and delete companies and users, including administrators and workers.
- Task Management – Explore how to create, filter, manage, and delete tasks, and how to monitor task progress and assign priorities.
- Location and Property Management – Understand how to create and manage locations, associate users with specific locations, and handle location deactivation and deletion.
- Vendor and Department Management – Manage vendors and departments, including creation, deletion, and assigning tasks or responsibilities.
- Reporting and Analytics – Generate various reports such as user and property reports to track and evaluate performance and progress.
- Questionnaire and QR Code Management – Create and manage questionnaires, set priorities, add follow-up questions, and generate QR codes to simplify data collection.
- Notification and Configuration Settings – Set up email and mobile notifications and adjust configuration settings to suit your organization’s needs.
This manual is your one-stop resource to understand and operate all the features available in the Fixalert Admin Panel. Whether you are a new user or need a refresher, this guide will ensure you can make the most out of every tool and feature provided.
-
Company Creation
-
Dashboard Task Summary and Location Tracking
-
Internal Task Creation on Admin Panel
-
Task Search & Filtering
-
Exporting Task Data
-
Task Management in Admin Panel
-
Task Deletion
-
Tagging Any Worker, Admin & Departments in Task Comments
-
Scheduled Task Creation in Admin Panel
-
Deleting Scheduled Tasks
-
Creating an Admin User
-
Creating Worker User
-
Enabling Enforced Feedback
-
Delete a User
-
Activation/Deactivation of User
-
Worker Tracking
-
Vendor Creation
-
Vendor Deletion
-
Department Creation & Management
-
Department Deletion
-
User Reports Generation
-
Property Reports Generation
-
Location Creation
-
Search Locations
-
User Association to Locations
-
Location Deactivation
-
Location Deletion
-
Questionnaire Creation
-
Adding Follow-Up Questions in the Questionnaire
-
Enabling Task for Vendor
-
Setting Task Priority in the Questionnaire
-
Mandatory Description and Custom Title in Questionnaires
-
Multilingual Questionnaires
-
Questionnaire Duplication and Deletion
-
QR Code Generation (Modern Template)
-
QR Code Generation (Classic Template)
-
QR Code Signs Editing and Deleting
-
Generating PDF of Multiple QR Codes
-
Notification Settings – Email & Mobile
-
Configuration Settings
-
Editing Organizational Profile
1. Company Creation
- Visit the Website – Go to the https://fixalert.io/dashboard/signup website.
- Sign Up – Click on the Sign Up button and fill in your details: name, email, phone number, and password.
- Email Verification – Verify your email by entering the OTP sent to your inbox.
- Create Company Profile – Enter company details such as name, industry, location, and other required information.
- Choose Pricing Plan – Select a suitable pricing plan for your company.
- Enable SMS Notifications (Optional) – Choose whether to enable SMS notifications for your clients.
- Complete Billing Details – Provide your billing details to finish the registration and setup process.

1.1. Login Functionality
- Go to https://fixalert.io/dashboard/login – Visit the Fixalert.io website.
- Enter Credentials – Input your email and password.
- Sign In – Click the Sign In button to access your account.

2. Dashboard Task Summary and Location Tracking
- Task Summary – The dashboard displays a concise task summary with a clear visual representation of task data, filtered by your selected parameters.
- Reported vs. Resolved – The Reported vs. Resolved line chart illustrates the task trends over time, depending on the applied filters.
Worker Tracking – The Worker Tracking feature shows a map with the locations of workers and provides detailed information about each worker when clicked.

3. Internal Task Creation on Admin Panel
- Go to Task Section – Navigate to the Task Section in the Admin Panel.
- Click Create – Click the Create button on the right side to start a new task.
- Select Details – Choose the location, department, and describe the issue.
- Submit – Once all details are filled, click Submit to create the internal task.

4. Task Search & Filtering
Easily search for tasks by title, details, or Complaint ID. To filter tasks, click the “Show Filter” button and refine the search by criteria such as status, department, vendors, assignee, property, date, and more. This feature helps you find specific tasks efficiently.

5. Exporting Task Data
Click the Export CSV button to generate task data, then download the CSV file by clicking the Download button.

6.Task Management in Admin Panel
Click on any task to view its details. The Task Management feature allows users to manage tasks directly from the Tasks section. Tasks can be moved through different stages like To Do, In Progress, Blocked, etc. Users can reassign tasks, link them to departments, or convert them between regular and vendor tasks. Additional features include adding comments, tagging team members, attaching images, and tracking task history. The three-dot menu enables quick actions like sharing task details, changing departments, setting severity, adjusting deadlines, and more.

7. Task Deletion
Tasks can be deleted by clicking the delete icon on the right side of each task.

8. Tagging Any Worker, Admin & Departments in Task Comments
Follow these steps to tag workers, admins, or departments in task comments:
- Open the Task
- Navigate to the Tasks section.
- Open the task detail view where you want to add a comment.
- Add a Comment
- Scroll to the Comments section.
- Click in the text box to type your message.
- Tag a Worker, Admin, or Department
- Type “@” followed by the user’s name or department.
- A dropdown list will appear—select the correct user or department.
- Attach Images (Optional)
- Click the Attach Image icon if you want to add supporting images.
- Post the Comment
- Click the Send or Post button to save your comment.
- The tagged users or department will receive a notification.
This feature ensures that relevant team members are immediately informed and can take action accordingly.

9. Scheduled Task Creation in Admin Panel
- Go to the Scheduled Tasks section.
- Click Create to add a new task.
- Select Department, Assignee, and Location.
- Set the Scheduled Frequency (daily, weekly, etc.).
- Click Create to finalize.

10. Deleting Scheduled Tasks
- Go to the Scheduled Tasks section.
- Locate the task you want to delete.
- Click the delete icon on the right side.
- Confirm deletion when prompted.

11.Creating an Admin User
Go to the Users tab in the sidebar and click on the Create button. Fill in the form with the user’s name, email, phone number, and assigned role, ensuring all details are accurate.
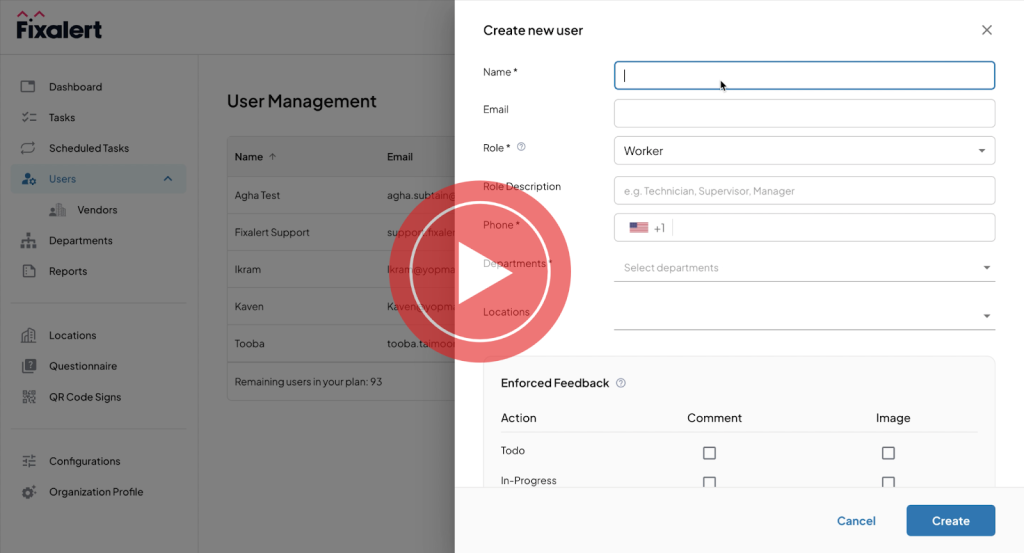
12. Creating Worker User
- Go to Users Tab – Click on the Users tab in the sidebar.
- Click Create – Click the Create button to add a new user.
- Fill in Details – Enter the user’s name, email, phone number, and assigned role in the form.
- Save – Ensure all details are accurate and click Save to create the worker user.
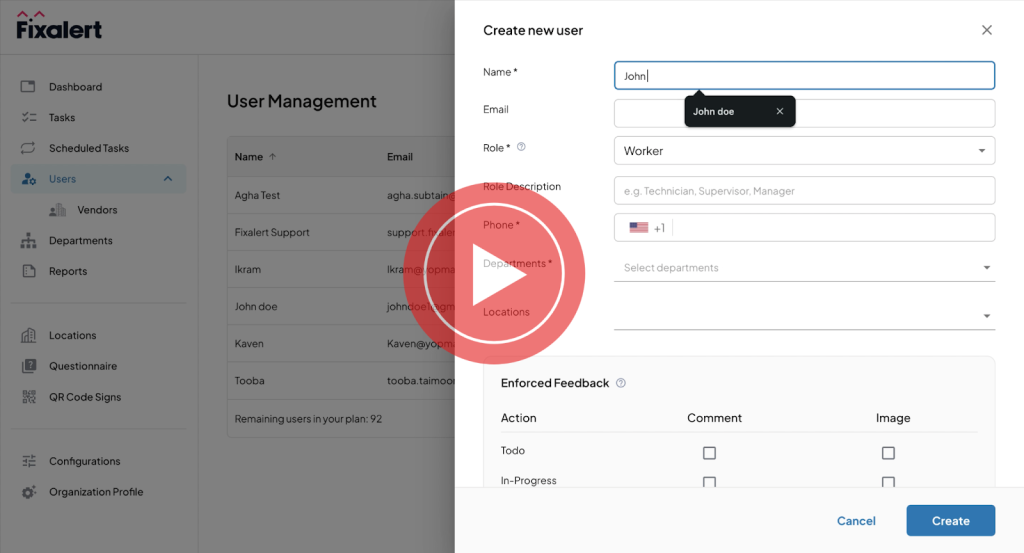
13. Enabling Enforced Feedback
- Go to User Creation Form – In the Users Creation form, locate the “Enforced feedback” option.
- Enable/Disable – Toggle the “Mandatory Comments” option to Enabled or Disabled.
- When Enabled, users must provide a comment or photo before changing the task status.
- Restrict Actions – You can also restrict users/workers from performing certain actions while transitioning task statuses, ensuring better control over feedback and task tracking.

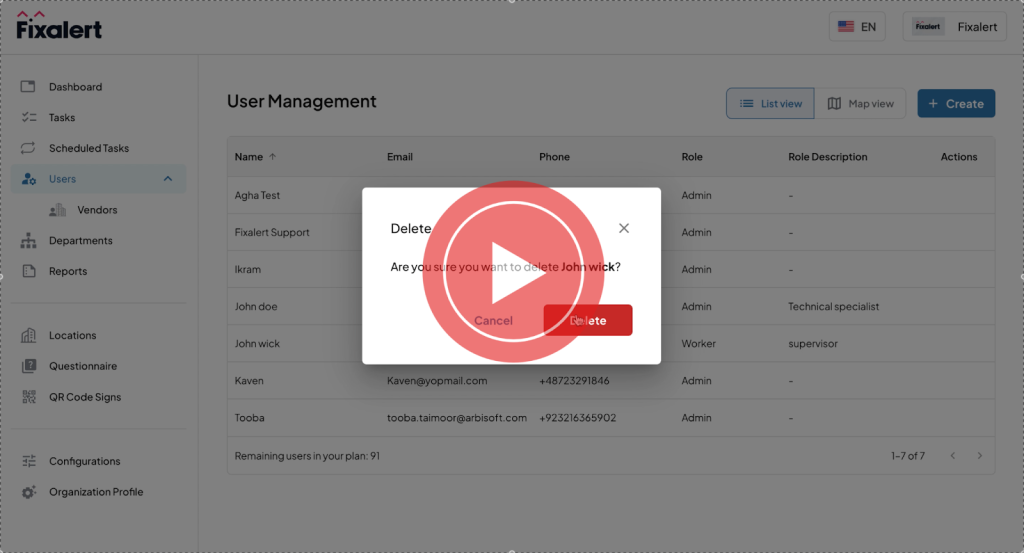
14. Delete a User
- Locate the User – Find the user in the list under the Users section.
- Hover Over the Row – Hover over the user’s row to reveal the trash can icon.
- Click to Delete – Click the trash can icon to delete the user from the system.
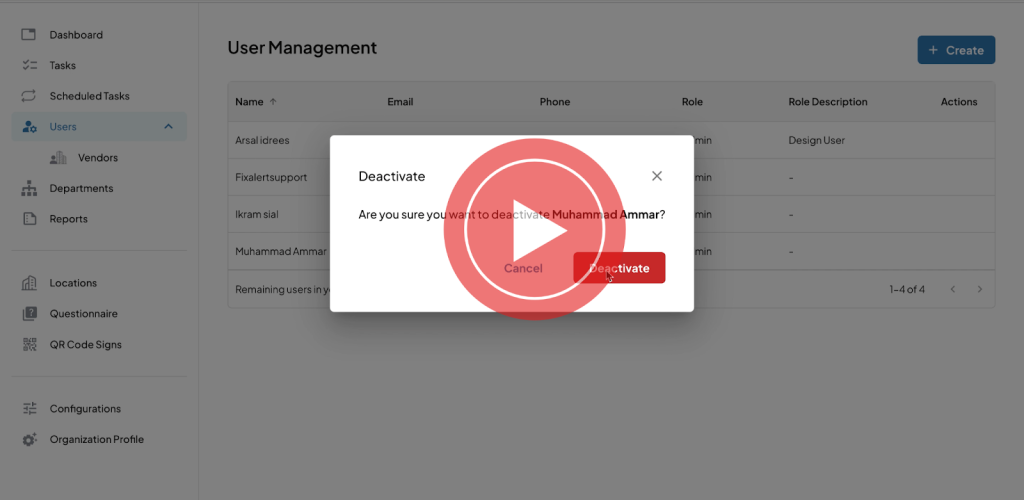
15. Activation/Deactivation of User
- Locate the User – Find the user in the list under the Users section.
- Hover Over the Row – Hover over the user’s row to reveal the deactivation icon.
- Click to Deactivate – Click the deactivation icon to deactivate the user.
- Reactivation: To reactivate, follow the same steps and click the activation icon.
16. Worker Tracking
- Access Worker Locations – Click the Map View button under the Users section to view a visual map of worker locations.
- View Worker Details – To see more information about a specific worker, click on their icon on the map.
- Monitor Real-Time Data – The worker’s details, including status, task assignments, and other relevant data, will be displayed for easy tracking.
This feature helps you monitor worker activities and locations in real time.
17. Vendor Creation
Navigate to the Vendor tab under the Users section and click the Create Vendor button. Fill in the required details in the form, including the organization name, address, contact details, email, and phone number. Once completed, click Create to add the vendor to the system.

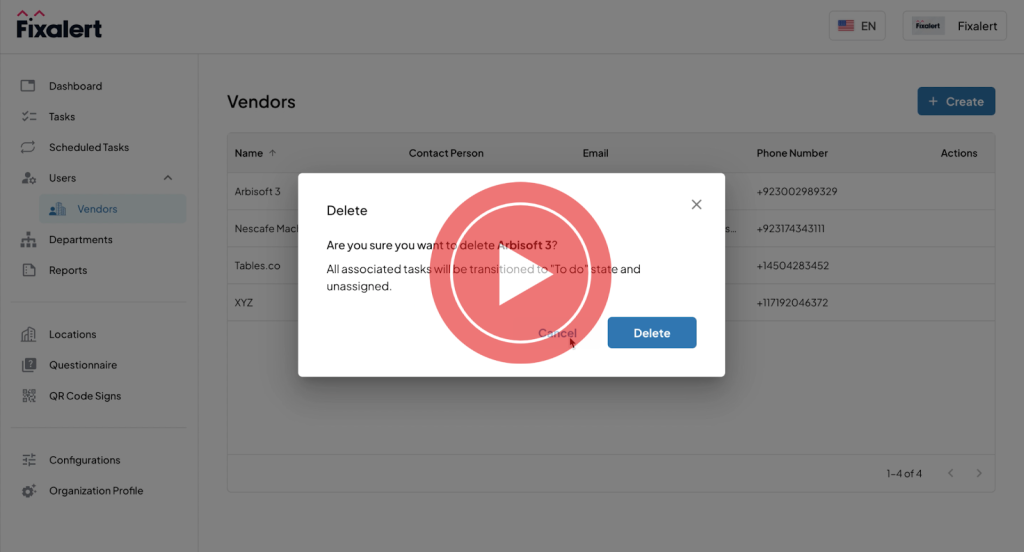
18. Vendor Deletion
Go to the Vendor tab under the Users section. Find the vendor you want to remove and click the Delete icon next to it to delete the vendor from the system.
19. Department Creation & Management
- Go to the Departments Tab: Click on the Departments tab in the sidebar.
- Click “Create”: In the top-right corner, click the Create button to add a new department.
- Enter Details: Fill in the form with the department name, email, and logo, then click Create to save. The new department will appear on the main Departments screen.

20. Department Deletion
To delete a department, find it in the Departments list, hover over its row, and click the trash can icon. A confirmation prompt will appear to confirm the deletion before the department is removed.

21. User Reports Generation
Go to the Reports section to generate user reports. Select the user, department, and date range, then click Generate Report to view the report.

22. Property Reports Generation
Go to the Reports section to generate property reports. Select the department, property, and date range, then click Generate Report to view the report.

23. Location Creation
- Click “Create” – Start adding a new property by clicking the Create button.
- Add a Building – Click Add Building to create a new building within the property (multiple buildings can be added).
- Add a Floor – Once the building is created, click Add Floor to add one or more floors.
- Add a Room or Section – Click Add Room or Section to assign rooms or sections to a specific floor (multiple rooms or sections can be added per floor).

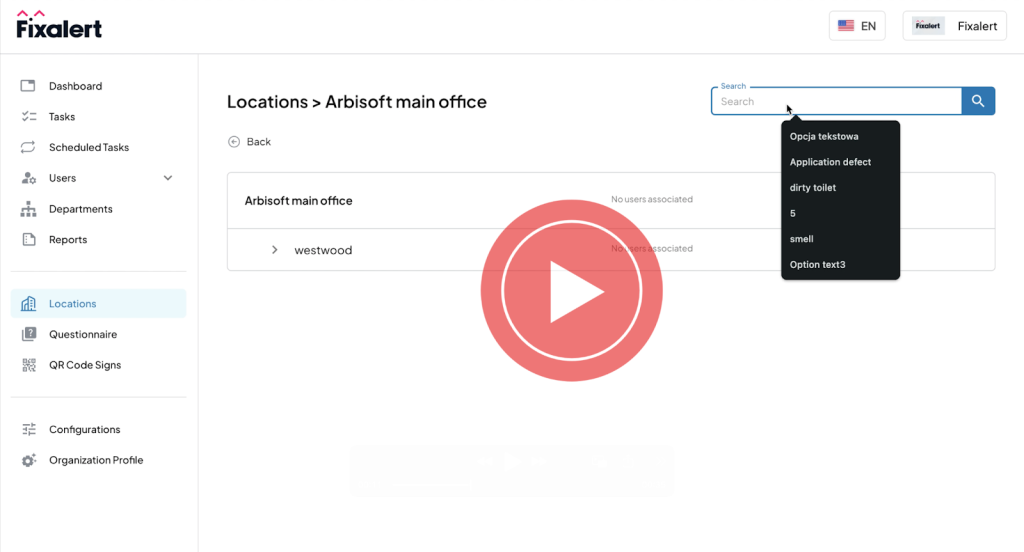
24. Search Locations
Users can search for any location using the search bar in the Locations section. You can look up specific properties, buildings, floors, or rooms by entering their names or relevant keywords. This feature helps quickly locate and manage different locations within the system.
25. User Association to Locations
To assign a user to a property, building, floor, or room/section, click the “Add User” button. A dropdown menu will appear, allowing you to select one or multiple users from the list. Once selected, the user(s) will be linked to the chosen location.

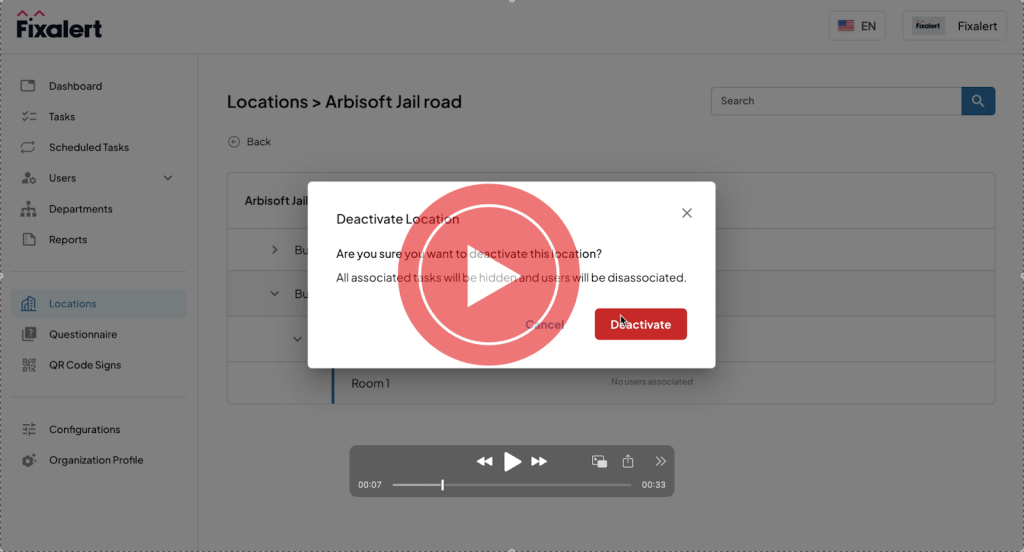
26. Location Deactivation
To deactivate a property, building, floor, room, or unit, hover over its row in the Locations section. The deactivation icon will appear—click it to disable the location.
27. Location Deletion
To delete a property, building, floor, room, or unit, hover over its row in the Locations section. Click the trash can icon that appears to permanently remove the location.

28. Questionnaire Creation
- Go to the “Questionnaires” Tab – Click on the Questionnaires tab to start creating a questionnaire.
- Enter Questionnaire Name – Type the name in the “Questionnaire Name” field.
- Add a Question – Click in the “Question” field and enter your question.
- Assign Departments – Click “Add Department”, select departments from the list, and click “Done” to confirm.
- Remove a Department – Click the “X” icon next to a department to remove it.
- Select a Department for Options – Click on the department icon on the first screen where you want to add response options.
- Add Options – A new screen will appear. Click in the “Option” field to enter an answer choice.
- Add More Options – Click the “Add Option” button to include additional response choices.

29. Adding Follow-Up Questions in the Questionnaire
- Click on the Settings Icon – Locate the settings icon next to the question.
- Enable Follow-Up Questions – If the selected option requires additional questions, choose “Yes” in the settings.
- Save the Setting – Click “Save”, and a new screen will appear on the right side.
- Add Follow-Up Questions – Enter the additional questions in the provided fields.

30. Enabling Task for Vendor
- Go to Settings – In the task settings, find the option “Is this a vendor task?”
- Enable Vendor Task – Select this option if the task is assigned to a vendor.
- Choose a Vendor – Select a vendor from the dropdown list, which includes vendors added under the “Vendors” section in Users.

31. Setting Task Priority in the Questionnaire
- Go to Settings – In the settings section, find the Escalation Level option.
- Select Priority Level – Choose the appropriate task priority from the dropdown list:
- Mildly inconvenient
- Highly inconvenient
- Life threatening

32. Mandatory Description and Custom Title in Questionnaires
- Mandatory Description or Custom Title – In the settings, choose whether a mandatory description or a custom title is required for the questionnaire.
- Set Requirement – Select the option to make it mandatory or leave it optional, depending on your needs.

33. Multilingual Questionnaires
When creating a questionnaire, users can select the desired language from the language dropdown at the top of the screen to change the language of the questionnaire. This allows you to create questionnaires in multiple languages based on the available options.

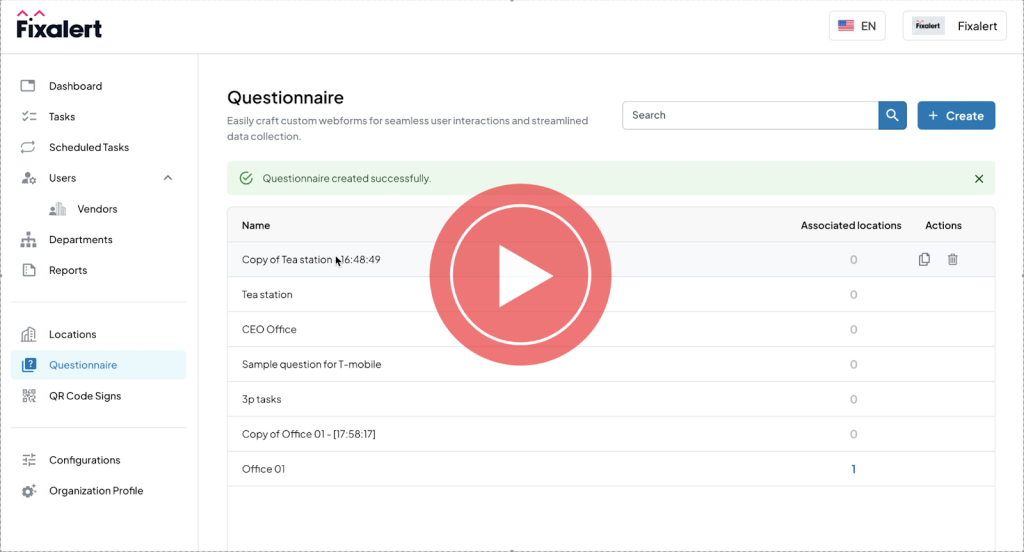
34. Questionnaire Duplication and Deletion:
- Duplicate a Questionnaire – Hover over the “Questionnaire” row, and click the copy icon that appears to duplicate the questionnaire.
- Delete a Questionnaire – Hover over the “Questionnaire” row, and click the trash can icon to delete the questionnaire.
35. QR Code Generation (Modern Template)
- Go to the “QR Code Signs” Tab – Click on the “QR Code Signs” tab in the sidebar to begin.
- Click “Create” – Click the “Create” button at the top of the page to generate a new QR code sign.
- Select a Property – Choose the property from the list to which you want to apply the QR codes.
- Select a Building – After selecting the property, choose the building where the QR code will be used.
- Select a Floor – Choose the floor where the QR code signs will be placed.
- Select a Room or Section – Select the room or section to associate with the QR code and click “Next”.
- Select a Questionnaire – Choose the questionnaire to link to the selected room or section, and click “Next”.
- Select a Template – Pick a modern template for the QR code sign, which determines its visual format.

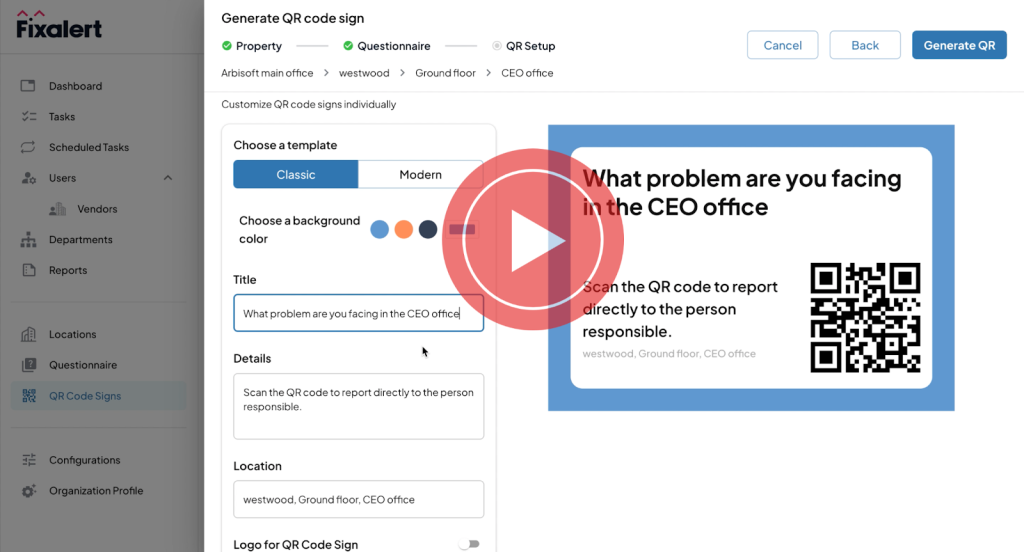
36. QR Code Generation (Classic Template)
- Go to the “QR Code Signs” Tab – Click on the “QR Code Signs” tab in the sidebar to begin.
- Click “Create” – Click the “Create” button at the top of the page to generate a new QR code sign.
- Select a Property – Choose the property from the list to which you want to apply the QR codes.
- Select a Building – After selecting the property, choose the building where the QR code will be used.
- Select a Floor – Choose the floor where the QR code signs will be placed.
- Select a Room or Section – Select the room or section to associate with the QR code and click “Next”.
- Select a Questionnaire – Choose the questionnaire to link to the selected room or section, and click “Next”.
- Select a Template – Pick a classic template for the QR code sign, which determines its visual format.
37. QR Code Signs Editing and Deleting
- Edit QR Code Stickers – To make changes to a QR code sign, click the pencil icon to edit it.
- Delete QR Code Signs – To remove a QR code sign, click the trash can icon to delete it from the system.

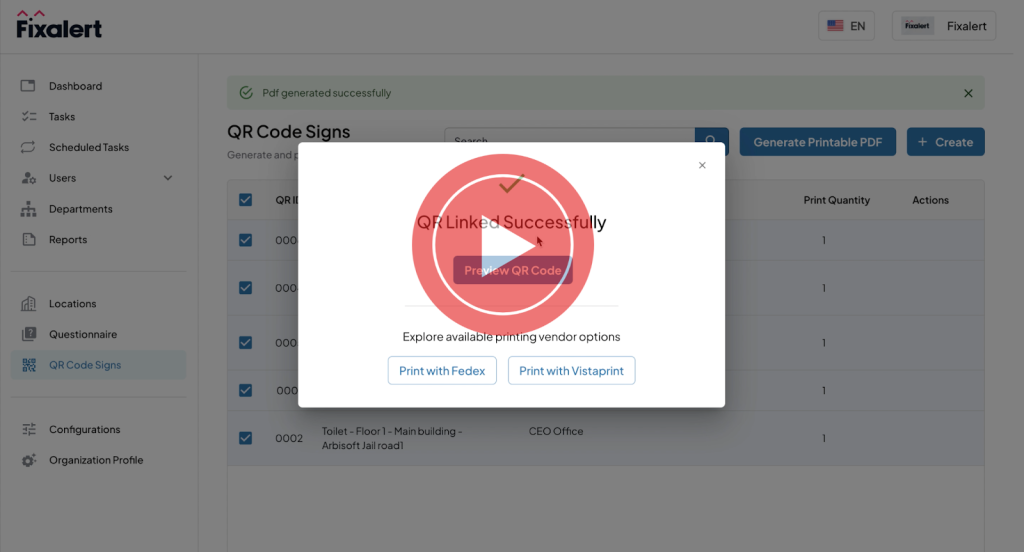
38. Generating PDF of Multiple QR Codes
- Print QR Codes – After saving, you can print the QR codes by selecting the “Number of Prints” field to adjust the number of copies.
- Generate PDF – To generate a PDF of multiple QR codes, select the desired QR signs, then click the “Generate Multiple PDF” button to create a single PDF file containing the selected QR codes.
39. Notification Settings – Email & Mobile:
- Go to the Configurations Section – Navigate to the Configurations section in the settings.
- Enable/Disable Notifications – For each task type, you can enable or disable email and mobile notifications by selecting the “Enable” or “Disable” option against each status.
- Update Changes – After making the desired changes, click the “Update” button to save the changes.

40. Configuration Settings
- Navigate to Configurations – Go to the Configurations section in the settings.
- Enable/Disable Toggles – You can enable or disable the following settings:
- Notify Complainant
- Custom Title
- Task Grouping
- Time Tracking
- Location Tracking
- Accuracy Threshold
- Location Tracking Time
- Update Changes – After adjusting the toggles as needed, click the “Update” button to save the changes.

41. Editing Organizational Profile
- Navigate to Organization Profile – Go to the Organization Profile section.
- Update Information – You can update the following fields:
- Organization Name
- Organization Address
- Organization Logo
- Logo for QR Code Sign
- Notification Emails
- Save Changes – After adding or updating the information, click the “Update” button to save the changes.

Introduction to fixalert Worker user manual
Welcome to the Fixalert worker user Manual! This guide will help you navigate and effectively use the key features of the worker manual. Each section includes clear instructions for easy understanding.
This manual covers essential features such as:
- Login Functionality – Access the admin panel securely.
- Internal Task Creation – Create tasks within the system.
- Task Status Updates – Change task statuses to track progress.
- Task Search & Filtering – Use the search bar and filters to find tasks quickly.
- Task Commenting & History – Add comments, track updates, and view task history.
- Task Details, Sharing & Call Assignee – View task details, share tasks, and contact assignees directly.
- Task Notifications – Receive notifications about task updates.
- Offline Mode & Availability Toggle – Work in offline mode and adjust availability status.
- Notification Settings – Customize notification preferences.
- Language & Translation Management – Change languages and manage translation files.
- Date & Time Settings – Adjust date formats and time display preferences.
This manual serves as a quick and comprehensive resource to help you make the most of Fixalert’s features.
-
Login Functionality
-
Internal Task Creation
-
Task Statuses Change
-
Search Bar in Tasks
-
Task Commenting and History
-
Task Details View, Sharing, and Call Assignee
-
Filtering Tasks
-
Task notifications
-
Offline Mode & Availability Toggle
-
Notification Settings
-
Changing Language in Settings
-
Translation files settings
-
Date format & time display settings
1. Login Functionality
- Go to the app login page – Visit the Fixalert.io website.
- Enter your phone number.
- Click the continue button to receive the OTP
- Add the OTP to login into your account.

2. Internal Task Creation
- Go to Task Section – Navigate to the Task Section in the Admin Panel.
- Click Create – Click the Create button on the right side to start a new task.
- Select Details – Choose the location, department, and describe the issue.
- Submit – Once all details are filled, click Submit to create the internal task.

3. Task Statuses Change
- Open the Home section.
- Click on the task you want to update.
- Click the status dropdown.
- Select the appropriate status (To Do, Start, Pause, Blocked, etc.) based on task progress.

4. Search Bar in Tasks
- Go to the search bar at the top.
- Enter the task title, details, or Complaint ID.
- The system will display matching results instantly.

5. Task Commenting and History
- Go to Task Details – Open the task and scroll to the Comments section.
- Add a Comment – Click in the text box and type your message.
- Tag Users or Departments – Type “@” followed by the name; select from the dropdown list.
- Attach Images (Optional) – Click the Attach Image icon to upload files.
- Post the Comment – Click Send or Post to save the comment. Tagged users or departments will be notified.
- View Task History – Open the History tab to see all task changes.

6. Task Details View, Sharing, and Call Assignee
- View Task Details – Tap on any task to see full details.
- Call Assignee – Tap the three-dot button and select Call Assignee to contact them directly.
- Share Task – Tap the three-dot button and select Share to send task details.

7. Filtering Tasks
- Tap on the Filter icon in the top right corner of the app.
- Apply filters based on Assigned To, Status, Task Type, Date, or Priority.
- The filtered tasks will be displayed based on your selection.

8. Task notifications
- Tap on the Notifications tab to view New and Archived notifications.
- To archive a notification, slide it to the right and tap the Archive button.

9. Offline Mode & Availability Toggle
- Availability Toggle: Tap the “@work” toggle in the top right corner to switch between available and away modes. When set to away, interaction is limited to viewing tasks, and all assigned tasks will be paused.
- Offline Mode: Continue working without an internet connection—update tasks, add comments, and more. Some features, like task creation and map view, require internet access.

10. Notification Settings
- Access Settings: Go to the Profile section and tap on the Notification Settings arrow.
- Manage Notifications: Toggle ON/OFF for mobile and email notifications for different task types.

11. Changing Language in Settings
- Go to the Profile section.
- Tap the Edit button next to the language option.
- Select your desired language (Currently available: English, German, Polish, and Ukrainian).

12. Translation files settings
Translate Content: Task details and comments can be translated into English, German, Polish, and Ukrainian, with more languages coming soon.
Manage Translations:
- Go to the Profile section.
- Open Manage Translations.
- Search for a language or tap the Download arrow to add it.

13. Date format & time display settings
- Go to the Profile tab.
- Tap on “Time Format Settings” to choose between:
Auto Default
Display Date & Time
Elapsed Time - Tap on “Date Format Settings” to select your preferred date format.
